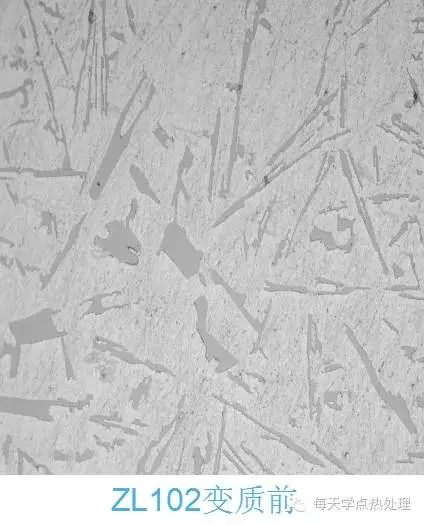
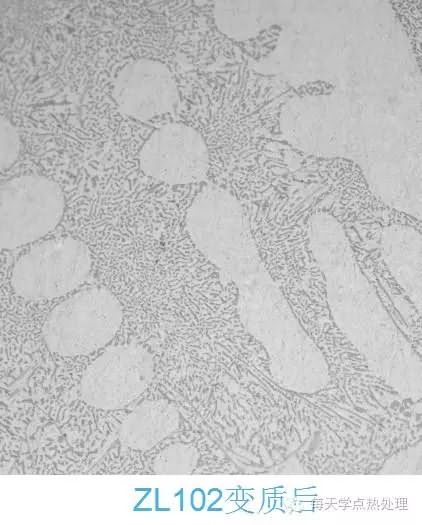
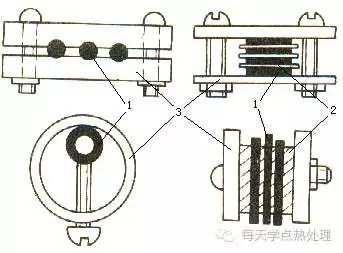
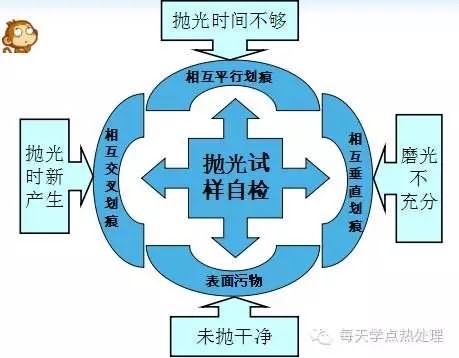
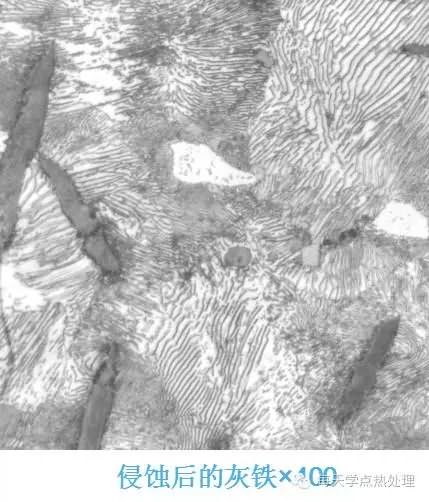
Metallographic sample preparation is a prelude to the identification of microstructures. It is a process of sampling, polishing, polishing, etching, etc., which makes the material a metallographic observation requirement. The prepared sample must have a clear field of view and a true tissue morphology, which lays a good foundation for microscopic identification. Metallographic sample preparation process Grinding of the sample Attention: When fine grinding by hand, no matter the thickness of the sandpaper, after the sample is ground, the whole trace left on the sandpaper should have the same color depth, the same width and the same size of the sample surface, and no trace of the arc should appear. Only in this way is it possible to ensure the smoothness of the entire grinding surface and reduce the chamfering of the sample, which lays a good foundation for the evaluation of the surface of the tissue, especially the surface treatment. Polishing cloth and polishing agent The choice of polishing fabric and polishing micropowder can be determined according to the actual conditions of each laboratory, the operator's habits. The following experience is for reference only: 1. A few drops of chromic anhydride aqueous solution in the Cr2O3 aqueous suspension and blended with the wool, polishing the cast iron sample, can clearly show the color and shape of the graphite; Note the problem: When the sample is polished, the surface tends to be contaminated with dirt. This kind of dirt adheres to the surface of the sample when it is rotated at high speed during polishing. Therefore, it cannot be cleaned with water and alcohol. It is observed under a microscope and is characterized by: 1. Regular, dense black dots or bright colored circles; Erosion time selection The length of time the sample is eroded is related to the material, the state of treatment, the age of the etchant, and the like. Method of operation Specific operation method: rinse the sample with water, rub the alcohol, and then tilt the surface of the polished sample to about 45o, wipe the surface of the sample with a cotton ball with an erosive agent, continuously observe the change of color and count the length of time in the heart. Confirm that the erosion time has expired, immediately rinse the sample with running water, and then rub the alcohol (this process is the key to the clean surface of the sample). Use a cotton ball with alcohol to wipe the erosion from top to bottom. On the surface of the sample, apply a little force (mainly alcohol in the extruded cotton ball), while wiping, alcohol will volatilize. When the surface of the sample is wiped, the alcohol should be completely evaporated in a very short time, then use the cool air of the hair dryer first. The surface of the sample was blown dry, and then the sample was blown dry with hot air, and finally the tissue was observed under a microscope. It is strictly forbidden to place a sample with a wet surface on the microscope! When the hair dryer blows the sample, it takes a long time because of its small wind power. If the surface of the sample is left with more alcohol, for beginners, when the sample is dried, it is often found that a light blue film or individual spots are covered on the microstructure. This is alcohol. The result of failure to volatilize in time to adhere to the surface of the sample. How to completely eliminate this phenomenon? For a qualified laboratory, you can purchase a small air compressor, use compressed air instead of the second rubbing alcohol and blow dry air to dry the sample. This not only saves anhydrous ethanol, but also makes the sample in It dries in an instant and can effectively prevent the occurrence of spots on the surface of the sample. This method has a good effect on all metallographic samples. The operation steps are: water rinsing and polishing the sample→wiping the alcohol→coating the etchant→water rinsing the sample→the air pressure air pump blowing the sample. Since the air pressure from the air compressor nozzle is large and the wind is large, the sample can be dried instantaneously to prevent some sample defects from being generated. Cast iron sample preparation techniques Features: Various forms of graphite exist in cast iron samples. When preparing samples, ensure that graphite is not polluted, does not fall off, and does not tail. It must also correctly reveal its shape, size and color. Otherwise, it will affect the accurate evaluation of the microstructure and even confuse graphite and defects. 1. Use woolen cloth as polishing fabric, add 3-4 drops of 1% chromic acid aqueous solution as polishing liquid in about 500ml of Cr2O3 aqueous suspension, and carry out mechanical-chemical polishing. It is easy to make the original color and original shape of graphite, and the effect is better. 2. During polishing, the sample continuously rotates, that is, there is relative movement between the sample and the held finger. This method can effectively prevent graphite tailing. 3. Dry grinding of the sample, graphite is also not easy to fall off. The correct polishing method can make the graphite appear in the original shape, and the correct etching method of the primary color can make the microstructure at a glance. High manganese steel sample preparation techniques Characteristics: High-manganese steel after water tough treatment is single-phase austenite with low hardness, good plastic toughness and good work hardening. Good cutting (wire cutting) method makes polishing easier Surface preparation sample preparation technique Features: Surface treatment sample inspection includes surface heating quenching hardened layer, chemical heat treatment layer, coating, layer, anti-oxidation layer and determination of the depth of oxidized decarburization layer on the surface of workpiece, and from the surface layer to the core Microstructure inspection, etc. In order to make these layers deep and accurate, the tissue is completely presented, the surface of the sample should be kept strictly flat, and the edge should minimize the occurrence of chamfering. Therefore, the preparation process of the sample is particularly important. Surface treatment sample preparation characteristics - focus on polishing and polishing Proper polishing and polishing methods make the surface structure clear Preparation techniques for welded joint specimens Features: Etchant Titanium, copper, hard alloy diffusion welded joints Etched titanium alloy: using hydrofluoric acid: nitric acid: water (volume ratio 1:4:45); Erosion effect The copper was etched with a 50 vol % nitric acid alcohol solution, and the titanium alloy and the hard alloy were respectively etched with a hydrofluoric acid aqueous solution of nitric acid and a newly prepared potassium ferricyanide potassium hydroxide solution. It was found that the nitric acid alcohol solution was eroded by the aqueous solution of ferric chloride and hydrochloric acid. The copper-titanium weld seam is better organized and clearer. Erosion techniques for aluminum alloy specimens Features: The aluminum alloy is relatively soft, and the surface of the sample is easy to produce a black oxide film during polishing and polishing. Rough throw: canvas + W3.5 high efficiency spray Fine polishing: woolen + W1 high efficiency spray By the above method, the generation of the oxide film and the elimination of scratches can be effectively prevented. Note: Since the aluminum alloy is oxidized rapidly in the atmosphere, the polishing, polishing and etching process of the sample must be done in one go to reduce the formation of oxide on the surface of the sample, so that the microstructure is clearly presented, so that the tissue is correctly evaluated. Provide good conditions. The polishing, polishing and etching process of the sample shall be carried out in one go to reduce the formation of oxide film on the surface of the sample. The purpose of metallographic sample preparation is to lay a good foundation for the correct identification of microstructure; correct identification of tissue is a powerful reference for the selection of other process parameters. Stamping And Welding Part,Metal Fabrication Steel Part,Fabrication Steel Part,Steel Rectangular Tubing JIANGSU TONGDE INTERNATIONAL TRADE CO.LTD. , https://www.jstongdetrade.com
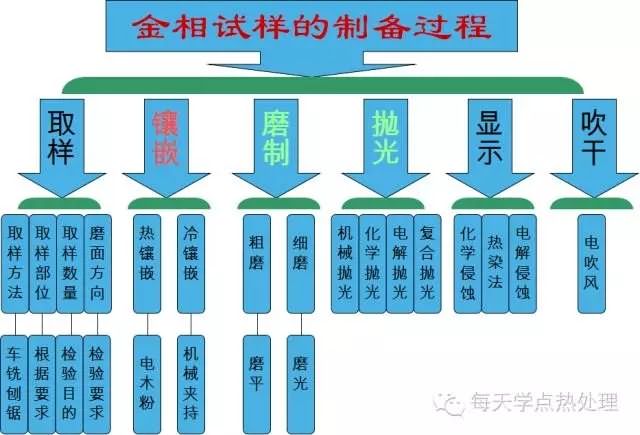
This process is not static and can be increased or decreased depending on the purpose of the inspection. 
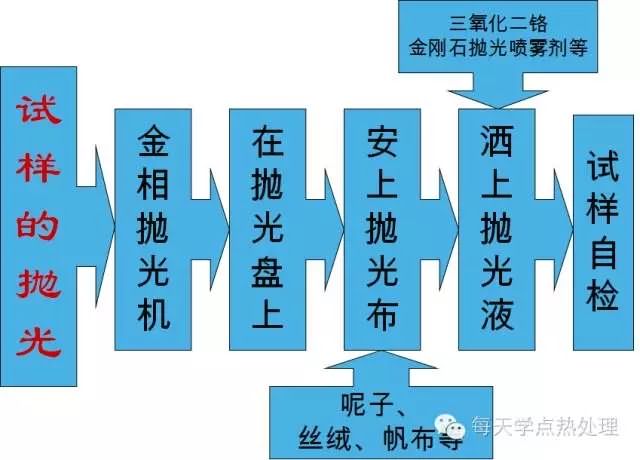
2. Polish the surface treated sample with canvas, with a small chamfer;
3. Canvas and Al2O3 with polished aluminum alloy samples, the effect is better;
4. Diamond high-efficiency spray and wool match, all the samples are polished, especially for high hardness, such as quenching and quenching and tempering samples. The polishing time is short, and the scratch on the surface of the sample can be basically removed after about 2 minutes;
5. If the sample is coarsely polished (using W3.5 high-efficiency spray) and finely polished (using W1 high-efficiency spray) with different polishing discs, the effect is better.
The polishing time of the sample is generally 3 min - 5 min. The scratches left when the time is too short can not be completely eliminated; the time is too long, the surface of the sample will be pit due to the falling off of the hard particles, and for the sample with soft material, new scratches may occur, which requires Re-polished.
2. Regular, sparsely colored black rice grain or ellipsoid.
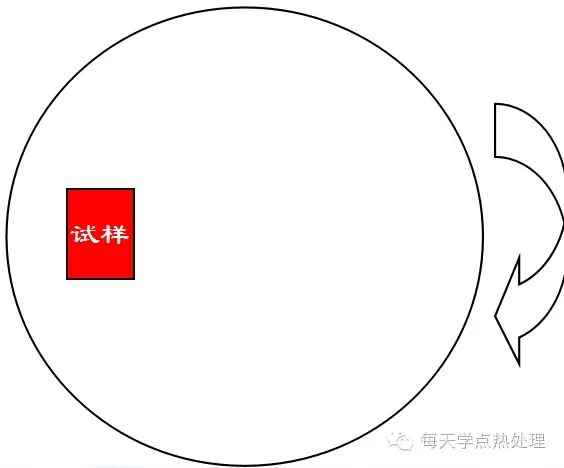
To eliminate this defect, in the later stage of polishing, pour a little water into the center of the polishing disc. The feel is such that the sample and the polishing fabric are gently contacted, and the surface of the sample is thrown clean. At this time, the sample is continuously rotated. 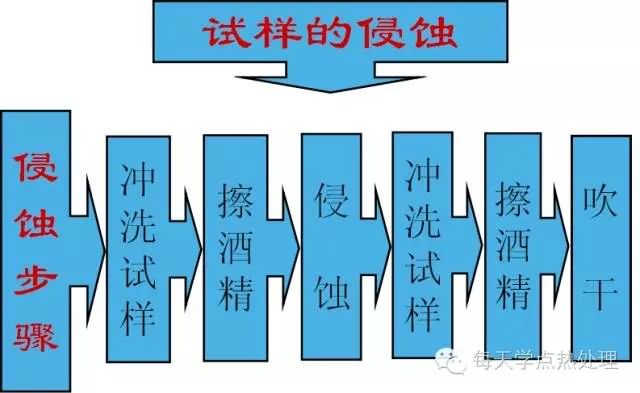

1. The erosion time is too short and the microstructure cannot be effectively displayed;
2. The etching time is too long, and the microstructure is ambiguous, which has a great influence on the correct identification and accurate evaluation of the microstructure;
3. Erosion of the appropriate sample, the microstructure should be clear at a glance, giving a fresh and comfortable feeling when observed.
For iron-carbon alloy equilibrium structure, the carbon content is from low to high, and the erosion time is from long to short (industrial pure iron time is about 20S, and carbon steel above eutectoid steel, time is 10S-15S) The color change of the surface of the sample is from silver gray to color (the microstructure of other heat-treated carbon steel samples is about 10S, and the color is dark gray). 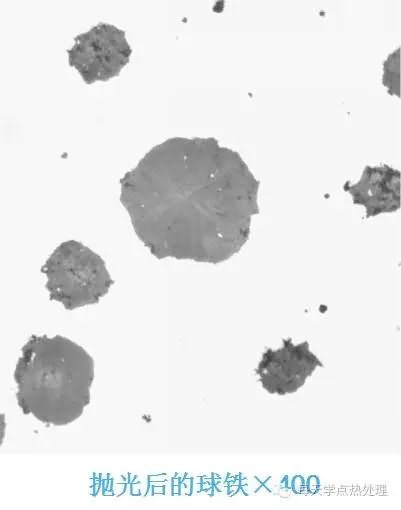
From the microstructure of high manganese steel after work hardening, the microstructure of the outermost layer of the hardened layer changes greatly, the grains become flat, the number of slip lines is large, and different grain slip lines are different. The direction. From the surface layer to the inside, as the degree of deformation decreases, the degree of deformation of the crystal grains decreases, and the slip line also decreases. 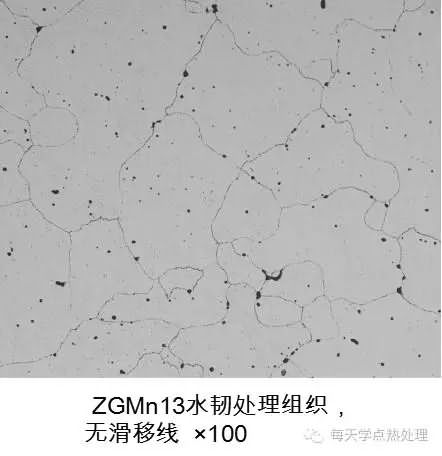
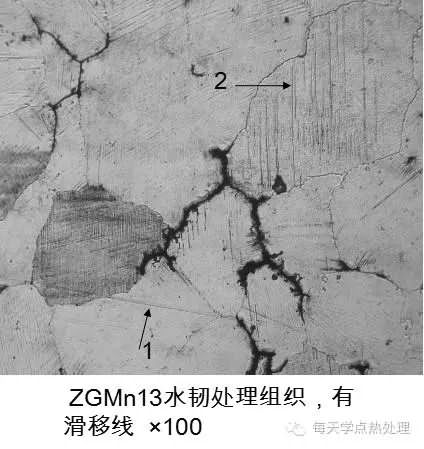
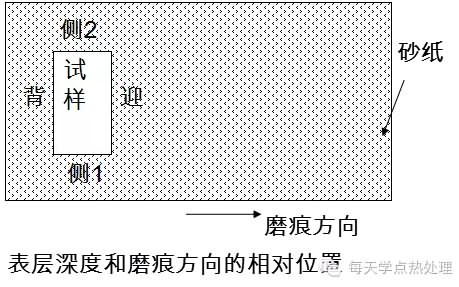
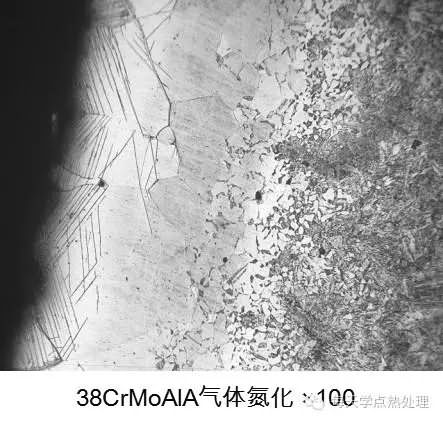
1. The material is soft and hard, and the unevenness should be minimized when polishing and polishing.
2. Different organizations, the etchant will be different, the length of erosion will be different, and the order will be different, especially the etchant can not affect each other.
3. To be determined by experiment.
Copper: aqueous solution of ferric chloride and hydrochloric acid; 50% aqueous solution of nitric acid; cemented carbide: newly prepared 20 vol% potassium ferricyanide and 20 vol% potassium hydroxide aqueous solution (1:1 by volume). 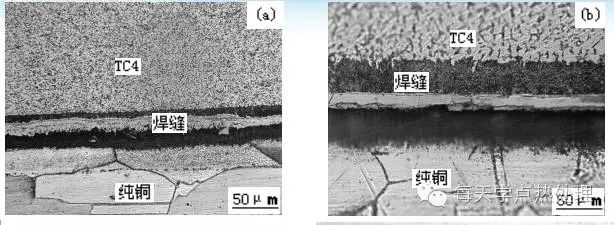
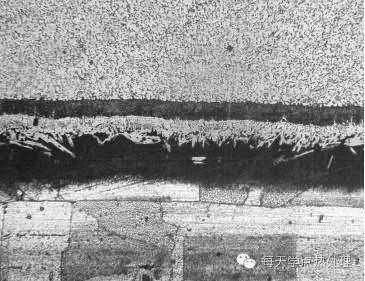
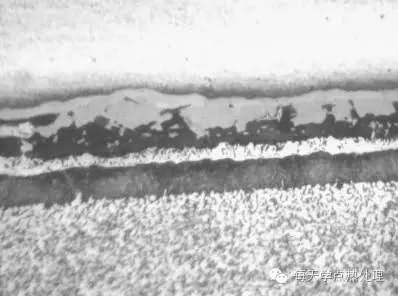
When grinding, the force should be moderate and must be stable, the speed should be as slow as possible, and it should not be too hurried to avoid overheating of the surface of the sample to produce oxides. 